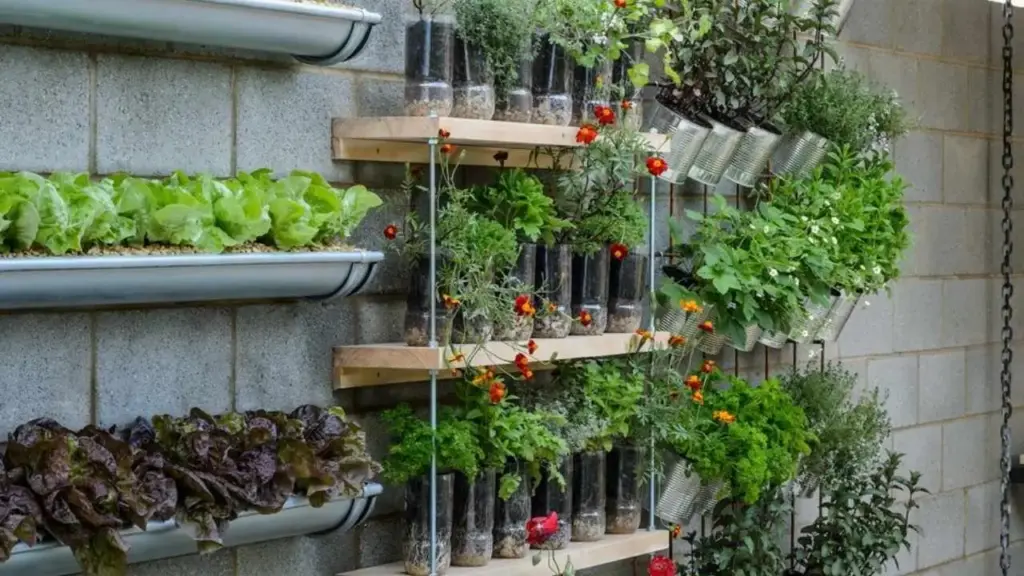
Is your living space feeling a bit stale? If you’re craving a touch of nature but think you lack the space or skills, I have good news. You can easily bring the vibrant energy of living plants into your home, and it all starts with a fun weekend project. The secret is to create your own personalized garden starters, a simple process that anyone can master. By making your own DIY planting kits, you get to connect with nature on your own terms, transforming a corner of your home into a tiny green oasis. These projects are perfect for adding life to a windowsill or bookshelf, and the satisfaction of watching something grow is a reward in itself. Get ready to explore five easy DIY planting kits you can assemble in just a couple of hours.
DIY Planting Kits
Building your own DIY planting kits is about more than just putting soil in a container; it’s an act of creation that offers total control and personalization. Unlike generic, store bought options, a homemade kit lets you be the designer. You can upcycle a beautiful container you love, choose the specific herbs you actually cook with, or select succulents that perfectly match your room’s aesthetic. This approach is not only budget friendly but also deeply rewarding. It strips away the complexity of gardening, boiling it down to a simple, enjoyable process. Crafting these kits is a wonderful way to de-stress, engage your creativity, and make something truly unique for your home or as a thoughtful, handmade gift.
| Kit Name | Ideal For | Main Supplies | Effort Level |
| Mason Jar Herb Garden | Kitchen windowsills, beginner gardeners, culinary enthusiasts. | Glass mason jars, pebbles, potting mix, herb seeds. | Easy |
| Stylish Succulent Terrarium | Desks, living room decor, low maintenance plant lovers. | Glass bowl/container, activated charcoal, succulent soil, small succulents. | Easy |
| Eco-Friendly Egg Carton Seed Starter | Starting vegetable or flower seeds indoors, projects with kids. | Cardboard egg carton, seed starting mix, seeds. | Very Easy |
| Speedy Upcycled Microgreens Grower | Health conscious individuals, impatient gardeners, small spaces. | Clear plastic takeout container, potting soil, microgreen seeds. | Very Easy |
| Fun Wildflower Seed Bombs | Outdoor spaces, supporting pollinators, guerrilla gardening. | Air dry clay, compost, native wildflower seeds. | Easy |
1. The Classic Mason Jar Herb Garden Kit
Imagine snipping fresh basil for your pasta sauce right from your kitchen window. This classic project makes that vision a reality. Mason jars provide a charming, rustic look and are the perfect size for a small indoor herb garden. They allow you to grow your favorite culinary herbs right where you need them most.
What You’ll Need to Assemble the Kit:
- Wide mouth mason jars
- Small pebbles or gravel
- Quality potting mix
- Herb seeds like basil, mint, parsley, or chives
Step-by-Step Instructions:
- Establish Drainage: First, add a one inch layer of pebbles to the bottom of each jar. Since there are no holes, this gives excess water a place to collect and protects the plant roots from rot.
- Add Potting Mix: Fill the jars with your potting mix, leaving about an inch of room at the top. Gently pat the soil down without compacting it.
- Plant Your Seeds: Sprinkle three to five seeds on the soil’s surface. Gently press them in and cover with a final dusting of soil.
- Water and Place: Water lightly until the soil is damp. Set your jars in a sunny spot that receives at least six hours of light daily. Keep the soil moist, and you’ll see sprouts soon. This is one of the most rewarding DIY planting kits for beginners.
2. The Stylish Succulent Terrarium Kit
Succulents are nature’s sculptures, and a terrarium is the perfect gallery to display them. These hardy plants require very little water, making them ideal for busy people or forgetful plant parents. This kit helps you create a beautiful, modern centerpiece that brings a touch of the desert landscape indoors.
What You’ll Need to Assemble the Kit:
- A clear glass container with a wide opening
- Activated charcoal
- Potting soil formulated for cacti and succulents
- An assortment of small succulent plants
Step-by-Step Instructions:
- The Charcoal Layer: Begin with a thin layer of activated charcoal. This is a crucial step for a closed container, as it helps filter the water and keep the soil environment healthy.
- Add the Soil: Add a layer of succulent soil, ensuring it is deep enough to hold the roots of your chosen plants.
- Arrange the Succulents: Gently remove your plants from their nursery pots, loosen the roots, and arrange them in the soil. Place the tallest one in the back or center and fill in around it.
- Finishing Touches: Once planted, you can add a top layer of decorative sand or small stones. Water very lightly and place in bright, indirect sunlight.
3. The Eco-Friendly Egg Carton Seed Starter Kit
This is a brilliant project for anyone looking to upcycle materials and get a head start on their spring garden. A cardboard egg carton serves as a perfect, biodegradable seed tray. When your seedlings are ready, you can plant the entire cup in the ground, which minimizes root disturbance and helps the plant thrive.
What You’ll Need to Assemble the Kit:
- A cardboard egg carton
- A lightweight seed starting soil mix
- Seeds for vegetables or flowers
- A water spray bottle
Step-by-Step Instructions:
- Prepare the Carton: Simply fill each cup of the egg carton with the seed starting mix.
- Sow Your Seeds: Poke a small hole in the center of each cup. Drop one or two seeds inside and cover them with a bit more soil.
- Water Gently: Use the spray bottle to mist the soil until it’s damp. A sprayer is better than pouring water, as it won’t dislodge the tiny seeds.
- Let Them Grow: Place the carton in a warm area. Once seeds sprout, move it to a sunny window. Keep the soil moist. This method is a fantastic introduction to making DIY planting kits.
4. The Speedy Upcycled Microgreens Grower
For those who want fast results, microgreens are the answer. These nutrient packed seedlings are ready to harvest in just one to two weeks. Using a clear plastic takeout container creates a miniature greenhouse, making the growing process incredibly simple and efficient. This is one of the fastest DIY planting kits you can make.
What You’ll Need to Assemble the Kit:
- A clean, clear plastic takeout container with a lid
- Potting soil
- Microgreen seeds like radish, broccoli, or arugula
Step-by-Step Instructions:
- Create Drainage: Carefully poke a few small holes in the bottom of the container.
- Lay the Foundation: Add about one to two inches of potting soil and smooth the surface.
- Scatter the Seeds: Sprinkle a dense layer of seeds evenly over the soil. Do not bury them; just press them down lightly.
- Mist and Cover: Spray the seeds and soil with water until moist. Place the lid on top to create a humid environment for germination.
- Harvest: Set the container in a sunny spot. Once sprouts appear, remove the lid. When the seedlings are a few inches tall, use scissors to harvest and enjoy them on salads or sandwiches.
5. The Fun Wildflower Seed Bomb Kit
This project is pure, messy fun with a wonderful purpose. Seed bombs are little balls of clay, soil, and seeds that you can toss into empty lots or neglected garden beds. The clay protects the seeds until rain comes, which then dissolves the ball and triggers germination, helping to support local pollinators like bees and butterflies.
What You’ll Need to Assemble the Kit:
- Air dry clay powder or natural clay
- Compost or potting soil
- A mix of native wildflower seeds
Step-by-Step Instructions:
- Combine Ingredients: In a bowl, mix 3 parts clay, 5 parts compost, and 1 part seeds.
- Add Water: Slowly add a little water and mix with your hands until you can form a firm ball that doesn’t crumble. The texture should be like play dough.
- Form the Bombs: Roll the mixture into small balls, about one inch in diameter.
- Dry and Distribute: Let the seed bombs dry in a sunny place for a day or two until they are hard. Then, take them on a walk and toss them into areas that could use more flowers. This is an engaging way to create DIY planting kits that help the environment.
Brush Smarter: The Eco-Friendly Benefits of a Bamboo Charcoal Toothbrush
FAQs About Green Your Space
1. Do I need a special lamp to grow these plants indoors?
For most of these kits, especially the herbs and microgreens, a sunny windowsill that gets 6 or more hours of direct sunlight is sufficient. If your home has low light, a simple LED grow light can be a great investment to help your plants thrive.
2. What’s the biggest mistake people make with DIY planting kits?
The most common mistake is overwatering. Without proper drainage holes, it’s easy for water to pool at the bottom of containers like mason jars and terrariums, leading to root rot. Always check if the soil is dry to the touch before adding more water. It’s better to underwater slightly than to overwater.
3. Can I use soil from my backyard?
It’s best to avoid using garden soil for indoor containers. Backyard soil is heavy, compacts easily, and can contain pests or weed seeds. Using a bagged potting mix or seed starting mix is recommended because it’s sterile, lightweight, and designed to provide the right balance of drainage and aeration for potted plants.
4. How long will the seeds in my kit last before I plant them?
Most seeds remain viable for at least a year or two if stored in a cool, dry, and dark place. Keep them in their original packets or an airtight container. However, for the best germination rates, it’s always ideal to use them within the growing season you purchase them.
5. Are these kits good gift ideas?
Absolutely! Assembling the materials for one of these DIY planting kits and packaging them in a nice box or basket makes a wonderful, personalized gift for birthdays, housewarmings, or holidays. It’s a thoughtful present that gives the recipient a fun activity and a living plant to enjoy.


